
The Torment Forbidden Traverse
We'll tackle the following objectives and skills:
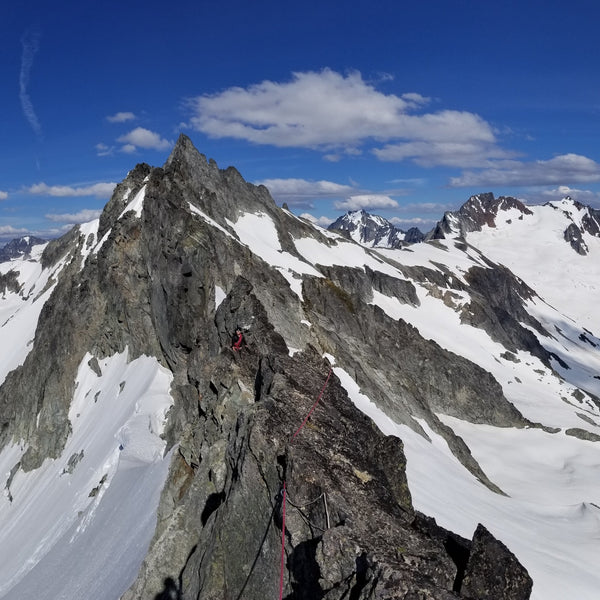
- Push Your Limits - The Torment Forbidden Traverse is a wild and challenging route. It involves summiting Mt Torment, wild and exposed snow and glacier travel, knife-edge rock ridges and over a mile of rocky ridge traversing before summiting Forbidden Peak by the West Ridge.
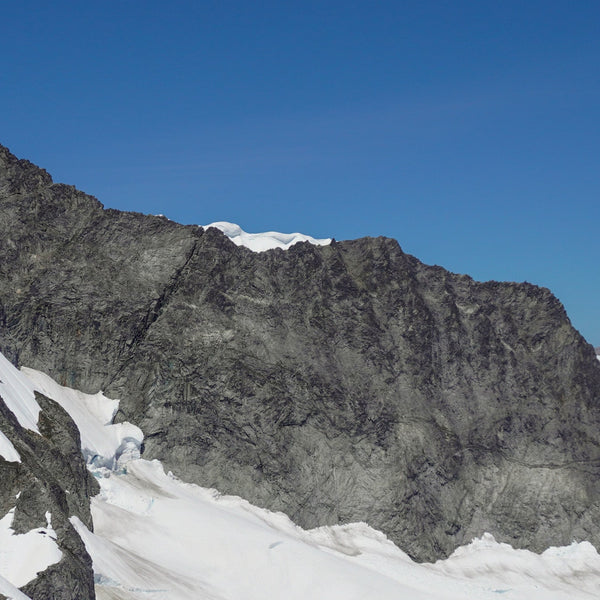
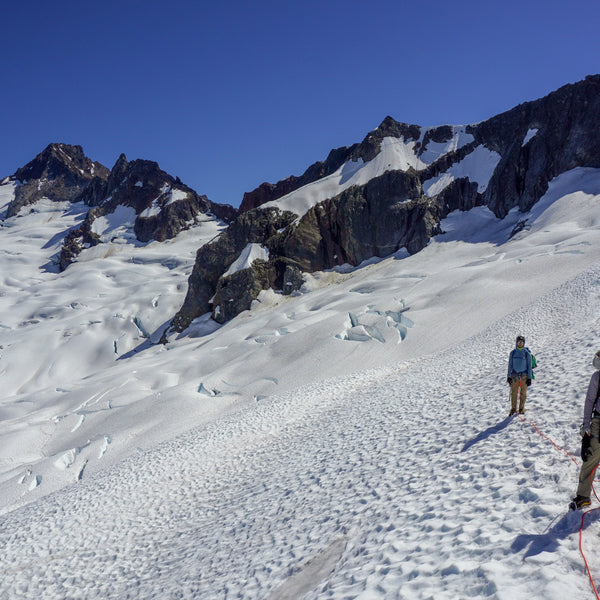
- The Route - A true Cascadian approach (read: overgrown and rugged) leads climbers to Boston Basin, an iconic rock amphitheater choked with glacial ice that feeds the creeks and lush meadows below. Typically, we will camp our first night in Boston Basin. From camp, the alpine climbing possibilities fan out 180 degrees from Mt Torment to Sahale Peak. Directly above camp looms Forbidden Peak, and from the basin it’s easy to understand how the ominous peak got its name.
- Traverse Attempt -
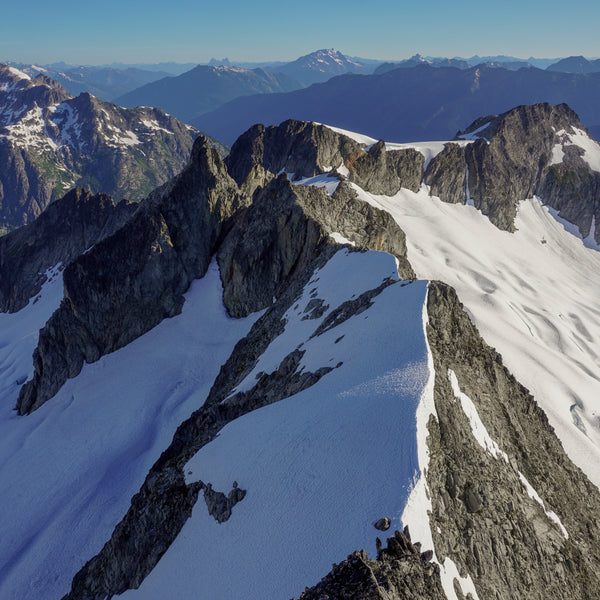
Mt Torment, on the far western side of Boston Basin, is connected to Forbidden Peak by a rugged granite ridge over a mile long. This ridge is the Torment-Forbidden Traverse, and the climb begins with a summit of Mt Torment. From there we rappel onto the north side of the ridgeline and find a bivy site where we can below the ridge.
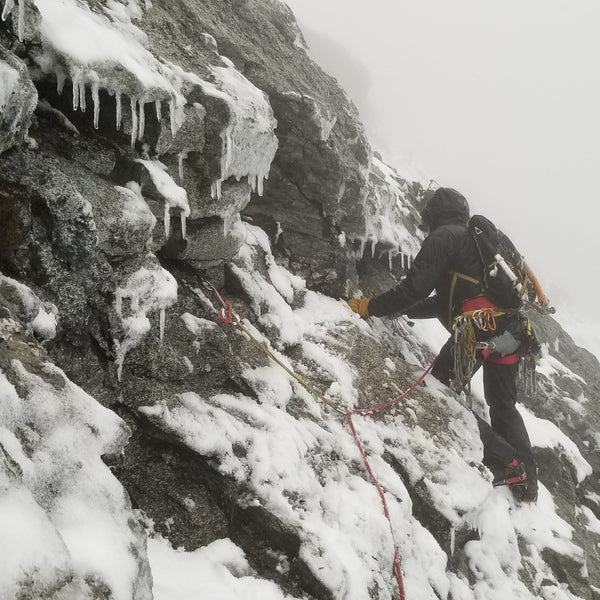
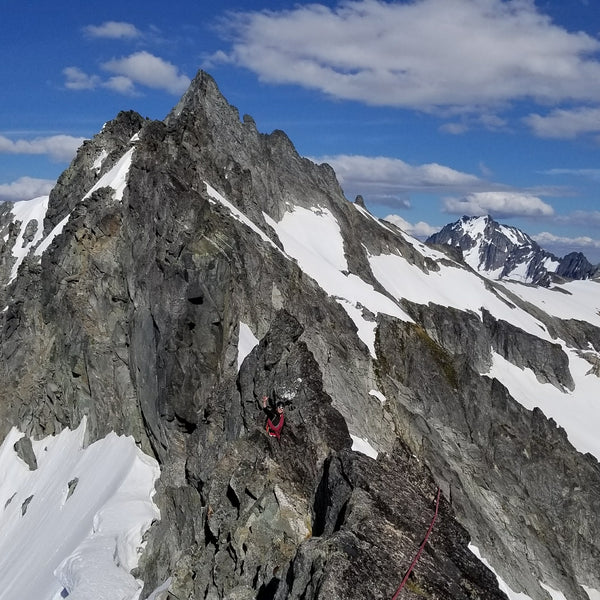
Our second day of climbing is a long one. After packing up camp, we traverse snow and steep rock to the base of the West Ridge of Forbidden. It's imperative that teams move quickly in this section because there is a lot of terrain to cover, and the descent is time consuming as well. From the notch, we climb the West Ridge of Forbidden to the summit. - Descent - The descent back to Boston Basin, where the entire climb begins, requires exposed down-climbing and a number of rappels (usually around 6-8 to return to the snow in Boston Bason.
Here's the schedule for your trip:
- Day 1 - Gear Check and Approach to Boston Basin - Gear Check: Meet early for a gear check in Marblemont, WA. Our guides will double check that you have all the right gear for the trip and help you minimize weight, decide on the perfect layers to pack, and choose how much food and water to bring.
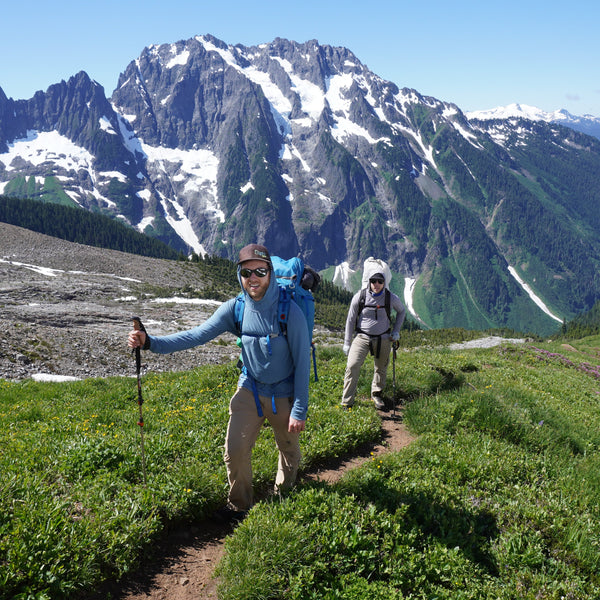
Approach to Boston Basin: Roughly 3-4 hours to camp with 3,000’ of elevation gain over 3 miles on a rough climber’s trail. We’ll get to camp, brush up on skills and get to bed early to rest up before our alpine start the next morning. - Day 2 -Summit Mount Torment and Bivy below the Torment-Forbidden Ridge - Mt Torment, on the far western side of Boston Basin, is connected to Forbidden Peak by a rugged granite ridge over a mile long. This ridge is the Torment-Forbidden Traverse, and the climb begins with a summit of Mount Torment. From there we rappel onto the north side of the ridgeline and find a bivy site where we can below the ridge.
- Day 3 - Traverse the Ridgeline from Mount Torment to Forbidden Peak - This is the hardest day of the trip, requiring efficient movement on the ridgeline, up the West Ridge and the descent back to camp. After packing up camp, we traverse snow and steep rock to the base of the West Ridge of Forbidden. It's imperative that teams move quickly in this section because there is a lot of terrain to cover, and the descent is time consuming as well. From the notch, we climb the West Ridge of Forbidden to the summit.
The descent back to Boston Basin, where the entire climb begins, requires exposed down-climbing and a number of rappels (usually around 6-8 to return to the snow in Boston Bason. - Day 4 - Pack Up Camp & Return to the Trailhead - After some much-earned sleep, we pack up camp and head back to the trailhead to finish the trip. The descent usually takes 2.5-3.5 hours.
Here are the skills and fitness you'll need for your course:
- Intermediate Alpine Climbing Experience - Including basic rope skills, experience with belaying, rappelling and technical climbing on 4th and 5th class rock. Depending on the time of year, crampon and ice axe techniques may be required. Looking to build these skills? Join us for an Intro to Mountaineering course!
- Excellent fitness - Able to spend 12-16 continuous hours outside, moving uphill at over 1,000’ per hour for durations of 1-2 hours between breaks. Participants should be able to hike 12-15 miles, climbing 3,000-6,000 vertical feet throughout the course of the day. People with excellent fitness typically have a strenuous workout 4-6 days per week. Be ready for a sufferfest!
Here's what's included with your trip:
- Experienced AMGA Trained Guide
- North Cascades National Park Permit
- Ropes & Gear
- SlingFin Tent
- Stove & Fuel
- Group Safety Gear - your guide will be equipped with a first aid kit
- Wag Bags - for human waste disposal in with compliance 'Leave No Trace' principles
- Meals
- Transportation
- Personal Mountaineering Gear - ice axe, crampons, climbing harness
- Guide Gratuities
North Cascades Alpine Climbing Gear List
- Mountaineering Gear (ice ax, crampon, harness) - Come prepared with your own gear or rent from Blackbird
- Other Mountaineering Gear (sleeping bag, pad, etc.) - Come prepared with your own gear or rent from:
Know Before you go

Blackbird Mountain Guides offers both scheduled group programs and private programs.
Private programs are simply above and beyond what Blackbird Mountain Guides currently has scheduled. Scheduled courses are not always less expensive. Before booking a trip with Blackbird Mountain Guides, clients are encouraged to review the differences between these types of programs, and to decide what works best for them.
SCHEDULED PROGRAMS
Scheduled Programs have fixed dates, itineraries, objectives, curriculum, and costs. They typically appeal to solo individuals or small groups or who are looking to share the cost of their program with a larger group. Correspondingly, scheduled programs are less expensive for smaller groups (1-2), and they provide the opportunity to meet others with similar interests. If you have a large group (3+), Scheduled programs will often be more expensive. They can fill up quickly, and scheduling flexibility is obviously limited.
Scheduled programs will have advertised dates. All scheduled programs can be run as private programs with private dates/rates as well.
PRIVATE PROGRAMS
Private programs have scheduling freedom. They typically appeal to those who would like some flexibility in planning their own trip or course. In this regard, Itineraries and objectives can be tailored to suit current conditions as well as client goals. Private programs are normally less expensive for larger groups (3+). If you have a small group (1-2) private programs will be more expensive.
Day 1 - Gear Check and Approach to Boston Basin
Gear Check: Meet early for a gear check in Marblemont, WA. Our guides will double check that you have all the right gear for the trip and help you minimize weight, decide on the perfect layers to pack, and choose how much food and water to bring.
Approach to Boston Basin: Roughly 3-4 hours to camp with 3,000’ of elevation gain over 3 miles on a rough climber’s trail. We’ll get to camp, brush up on skills and get to bed early to rest up before our alpine start the next morning.
Day 2 - Summit Mt Torment and Bivy below the Torment-Forbidden Ridge
Day 3 - Traverse the Ridgeline from Mt Torment to Forbidden Peak, Climb Forbidden and descend to Boston Basin
This is the hardest day of the trip, requiring efficient movement on the ridgeline, up the West Ridge and the descent back to camp.
Day 3 - Return to the trailhead
After some much-earned sleep, we pack up camp and head back to the trailhead to finish the trip. The descent usually takes 2.5-3.5 hours.
We'll tackle the following objectives and skills:
- Push Your Limits - The Torment Forbidden Traverse is a wild and challenging route. It involves summiting Mt Torment, wild and exposed snow and glacier travel, knife-edge rock ridges and over a mile of rocky ridge traversing before summiting Forbidden Peak by the West Ridge.
- The Route - A true Cascadian approach (read: overgrown and rugged) leads climbers to Boston Basin, an iconic rock amphitheater choked with glacial ice that feeds the creeks and lush meadows below. Typically, we will camp our first night in Boston Basin. From camp, the alpine climbing possibilities fan out 180 degrees from Mt Torment to Sahale Peak. Directly above camp looms Forbidden Peak, and from the basin it’s easy to understand how the ominous peak got its name.
- Traverse Attempt -
Mt Torment, on the far western side of Boston Basin, is connected to Forbidden Peak by a rugged granite ridge over a mile long. This ridge is the Torment-Forbidden Traverse, and the climb begins with a summit of Mt Torment. From there we rappel onto the north side of the ridgeline and find a bivy site where we can below the ridge.
Our second day of climbing is a long one. After packing up camp, we traverse snow and steep rock to the base of the West Ridge of Forbidden. It's imperative that teams move quickly in this section because there is a lot of terrain to cover, and the descent is time consuming as well. From the notch, we climb the West Ridge of Forbidden to the summit. - Descent - The descent back to Boston Basin, where the entire climb begins, requires exposed down-climbing and a number of rappels (usually around 6-8 to return to the snow in Boston Bason.
Here's the schedule for your trip:
- Day 1 - Gear Check and Approach to Boston Basin - Gear Check: Meet early for a gear check in Marblemont, WA. Our guides will double check that you have all the right gear for the trip and help you minimize weight, decide on the perfect layers to pack, and choose how much food and water to bring.
Approach to Boston Basin: Roughly 3-4 hours to camp with 3,000’ of elevation gain over 3 miles on a rough climber’s trail. We’ll get to camp, brush up on skills and get to bed early to rest up before our alpine start the next morning. - Day 2 -Summit Mount Torment and Bivy below the Torment-Forbidden Ridge - Mt Torment, on the far western side of Boston Basin, is connected to Forbidden Peak by a rugged granite ridge over a mile long. This ridge is the Torment-Forbidden Traverse, and the climb begins with a summit of Mount Torment. From there we rappel onto the north side of the ridgeline and find a bivy site where we can below the ridge.
- Day 3 - Traverse the Ridgeline from Mount Torment to Forbidden Peak - This is the hardest day of the trip, requiring efficient movement on the ridgeline, up the West Ridge and the descent back to camp. After packing up camp, we traverse snow and steep rock to the base of the West Ridge of Forbidden. It's imperative that teams move quickly in this section because there is a lot of terrain to cover, and the descent is time consuming as well. From the notch, we climb the West Ridge of Forbidden to the summit.
The descent back to Boston Basin, where the entire climb begins, requires exposed down-climbing and a number of rappels (usually around 6-8 to return to the snow in Boston Bason. - Day 4 - Pack Up Camp & Return to the Trailhead - After some much-earned sleep, we pack up camp and head back to the trailhead to finish the trip. The descent usually takes 2.5-3.5 hours.
Here are the skills and fitness you'll need for your course:
- Intermediate Alpine Climbing Experience - Including basic rope skills, experience with belaying, rappelling and technical climbing on 4th and 5th class rock. Depending on the time of year, crampon and ice axe techniques may be required. Looking to build these skills? Join us for an Intro to Mountaineering course!
- Excellent fitness - Able to spend 12-16 continuous hours outside, moving uphill at over 1,000’ per hour for durations of 1-2 hours between breaks. Participants should be able to hike 12-15 miles, climbing 3,000-6,000 vertical feet throughout the course of the day. People with excellent fitness typically have a strenuous workout 4-6 days per week. Be ready for a sufferfest!
Here's what's included with your trip:
- Experienced AMGA Trained Guide
- North Cascades National Park Permit
- Ropes & Gear
- SlingFin Tent
- Stove & Fuel
- Group Safety Gear - your guide will be equipped with a first aid kit
- Wag Bags - for human waste disposal in with compliance 'Leave No Trace' principles
- Meals
- Transportation
- Personal Mountaineering Gear - ice axe, crampons, climbing harness
- Guide Gratuities
North Cascades Alpine Climbing Gear List
- Mountaineering Gear (ice ax, crampon, harness) - Come prepared with your own gear or rent from Blackbird
- Other Mountaineering Gear (sleeping bag, pad, etc.) - Come prepared with your own gear or rent from:
Epic Reviews From Adventurers
- Rated 5 out of 5 starsCoudn't have imagined a better Rainier Summit!
Blackbird Guides is the best! I've been using their services for about 3 years and every adventure has been absolutely incredible. Each of the guides are full of knowledge and incredibly good at passing along their years of expertise. I just summited Rainier with Brandon and Andrew and I couldn't have imagined a better experience all around. I refer everyone I know to Blackbird.
April H.Verified Buyer - Rated 5 out of 5 starsHit 3 Cascade summits, truly outstanding guiding!
We did a five day trip. Hit three summits. Truly outstanding guiding by Zeb and Aaron. Their knowledge of the mountains is impressive. They knew how to modify the trip on the fly based on skill level. Pushed the right amount to get us there but still made it casual and fun. I rock climb but this was my first alpine climbing and I’d recommend Blackbird to any first timers.
Anthony V. - Rated 5 out of 5 starsBaker North Ridge was amazing!
Did a 3 day trip with Blackbird on Baker North Ridge. Was an amazing experience. Our guide, Arthur, was knowledge, and willing to teach us. Would be happy to book another trip with them again.
David S.Verified Buyer - Rated 5 out of 5 starsFantastic climb & outstanding guide company!
A Fantastic Climb! Blackbird Mountain Guides is outstanding guide company. I had the opportunity to climb with Zeb Blais where we summited (along with two others) Forbidden Peak in the North Cascade mountain range in Washington. It was a challenging climb but well worth it. Zeb is a professional. His knowledge and calm demeanor made for a rewarding and memorable experience. One of things I like best about Blackbird is the communication. Zeb emphasized safety, training and having fun. If you're looking for a solid guide company, look no further. I can't recommend Zeb and Blackbird highly enough.
Jay R.
the blackbird difference

Innovative courses

Professional Guides

Positive Progression

Community Focused

ongoing support
We’re here to help. Our FAQs or Gear Lists might have the information you’re seeking. But If you’re not finding the information you need, we’d be happy to help!